Introducing... Norwegian Wood

I love the warm and rustic look of Norwegian Wood. It is a perfectly reversible, richly textured cowl knitted seamlessly in Half Fisherman's Rib with the Entrelac technique. Fun to make and cozy to wear, Norwegian Wood makes a perfect Christmas gift!

I used 12-stitch-wide motives in the pattern to create big and bold, interweaved blocks. Feel free to make the motives smaller. I think an 8-stitch repeat will be attractive, too.

The Half-Fisherman's Rib stitch pattern is very straightforward. Nevertheless it creates interesting textural and visual effects on the knitted fabric, with the right side and wrong side look and feel dirrent. One side looks "rough", whereas the other side is "smooth".

Since I tried to be playful with the pattern, I alternated between the rough and smooth sides to be used as the right side for my entralec cowl. If you look closer, you will see that the cream color motives has the rough side up, and the brown color motives has the smooth side up. But since the cowl is perfectly revisible, when you turn to the "wrong" side of the cowl, the pattern is actually flipped. It's the kind of subtelty that only the maker will know and appreciate, I guess.

In terms of yarn choice... I think any Aran or worsted weight yarn will work. I simply picked two natural toned, 100% wool yarn from my stash and started my experiment. The yarns are from different companies with different finishes, but it turned out that they blended well, and gave me the rustic, woody tone that I wanted.

I am ready for winter!

The pattern is now available on my site. You can also get the pattern through Ravelry. Happy knitting!

August

A month was skipped in my blog entry… AGAIN. That reminds me how I have been busy with life, indeed.

My parents and brother came visit us last month. I had to disassemble my cutting table and set up a twin bed in my swing room for my brother. No sewing could be done.

Fortunately, I did have some knitting accomplished.

First, a pair of mitts for myself. Custom fit, extra short. It's made with WYS Bluefaced Leicester DK in seed stitch on 3.5mm double-pointed needles. The natural, un-dyed colours and the silky, smooth feel of the fibre are just fabulous, and it was a joy to touch and knit with! I actually finished the fist mitt back in January or February, but suffered a bit from the "second-sock/mitt/glove/etc" syndrome. The mitts are so easy to make... I am not even sure if it can be justified as my own pattern.

I also had my first tryout with entralec knitting and had something that I considered construction-wise rather interesting made. It’s a cowl knitted seamlessly in the entralec way in half fisherman’s rib. I personally loved the design, so I made it into a pattern, which will be available tomorrow. 

Last but not least, I currently have another commission work going on with a magazine. It will be a lovely piece of beaded lace knitting, and the design will be unveiled next summer. Stay tuned!

Zakka

I really adore the Scandi prints by Kokka. Got some yardages from Fabricworm years ago (2011), and I reserve them to make gifts only for my best friends. These are medium weight cotton-linen blends, great for pouches and bags. In the past two weekends, I had some time to made a needle book case for myself, and two cosmetic bags for my friends. 

The alphabet print is actually the Happy Thoughts collection by Julie Comstock of Cosmo Cricket for Moda, which is equally appealing and a very good quality medium weight fabric. The alphabet bag is for Kathy, a super smart, very nice girl and a Google handheld security expert. The patchwork print is Kokka Trefre Cocktails. And the cocktails bag is for Winnie, another good friend of mine, a geophysicist and a wife-to-be of a bio-physics professor. We will have our annual reunion tomorrow. I can't wait to congratulate Winnie, who just got engaged, and give my best wishes to Kathy, who will introduce us her Mr. Right (what a surprise!) I feel so happy for them. With such a happy mood, I finished the bags so quickly. 

I used medium weight fusible interface for the bags to give them a better shape. Also, they are fully lined for a neat interior finish. The design is a hack of a LeSportSac cosmetic bag of my sister's. I blogged about it here. The design is so clever, one-piece, minimalist and practical. 

My needle book case is for my premium Japanese hand sewing needles. The fabric is Kokka Trefre Scandi Farm. I have tried several brands of Japanese hand sewing needles now, and they are all so well made. A joy to use, and so they deserve a good home = )

2015 = A Year of Learning New Techniques Part II

Part II of today's entry is about...GARMENT SEWING! Other then aprons, I had never made something wearable previously, until this one:

Seriously, I was not 100% certain about what I was doing, or if I was doing everything the right way. No one taught me dressmaking before. Luckily, the Internet, a number of Craftsy classes, and a bookshelf of sewing books gave more than enough resources to guide me through making my first blouse. Yes, I am the kind of person who "collects" sewing books and patterns even though I don't sew very seriously. I just love the subject of sewing and admire the beauty of couture. But still, I wish I can have someone checking out my sewing, helping me out through the fitting process, and advising me on how to make my work better and faster. 

The pattern is vintage MaCall's 8194. I think it's a 60s design. There is no date printed on the envelope. I got it from the Workroom several years ago (perhaps in 2009), back in that time there was a box next to the window full of vintage sewing patterns. The box is not there anymore. It's most perhaps the easiest pattern I have at hand: no set-in sleeves, no button holes, no linings, and very straightforward Peter Pan collar.  So, although the size is bigger than my body measurements, I decided to give it a try. 

After two test versions I changed a number of things:

1. Narrowed the shoulder by two inches. 2. Lowered the bust darts by 1 inch. 3. Reshaped the shoulder line for my sloping shoulder. 4. Replacing the invisible back zipper with a slit opening on top. 5. Redrafted the collar because strangely the original version is kinda too tight for the neck (the drafting is based on the Bunka Garment Design Textbooks from my collection of sewing books). 6. Substitute neck facing with bias strip binding. 

It's a lengthy, trial-and-error process for someone like me who had never done this before. I felt so frustrated! Somehow, I was able to waddle through the process and have the actual sewing done. It's a miracle! I am very proud myself (being not given up). 

The floral fabric is obviously Liberty Tana Lawn, from my quilting fabric stash. The body fabric is a  somewhat tightly woven cotton chambray from a local store called Sultan's Fine Fabrics. Their warehouse is amazing! So big, so many fabrics, and to hard to choose what to buy!

I am looking forward to making the next blouse, another vintage pattern of 60s design. 

I love vintage patterns that they have both the cut line and seam line printed, and only one size is printed per envelope. But the fact that I will have to go through the instructions so tinily printed is intimidating. Well, dealing with equally horrible construction drawings and shop drawings have been my routine work in the office, so hopefully I will be fine. 

2015 = A Year of Learning New Techniques

I just realized there was no blog posted in May! Actually, I haven't stopped stitching. I have indeed a lot to show and tell, despite last month I was so busy at work! Let's begin with some quilting...

Over the last two years I have built a rather big fabric stash, in which a large portion is reproductions and period inspired prints. The idea of making a scrappy sampler quilt out of these prints has been lingering in my mind for some time. I want a unique sampler quilt made up of both appliqué and pieced blocks. The pieced blocks should be the more complicated ones, not just QSTs and HSTs put together. And the appliquéd ones should consisted of both hand appliqués and machine appliqués. After all, I want to use the sampler quilt as a learning tool to play with colour, improve my level of precision, and try new techniques. So far, I have completed four pieced blocks. 

As usual I drafted the blocks myself to get the size I wanted. The smaller ones are all about Y-seams. They are not all finished perfectly. I still have to think about how to adjust the seam allowance to have to blocks not finished 1/8" smaller then intended. Some people suggested that I have to pre-wash my fabrics to shrink them first. That will be really troublesome because I make mostly scrappy quilts and that means I have to start now prewash every piece of fabric in my stash. Also, I am not sure if shrinkage is really the key issue. Usually I do not use steam to press in progress motives. Perhaps it's more because of the bulkiness of the seams, since I found pressing the seams open does help a bit. Anyways, I have not yet tried to move the needle one or two clicks to the right as some people does to address the bulkiness issue (what if I forget to change it back to the normal position later?!) But definitely I will try next time, carefully and mindfully.

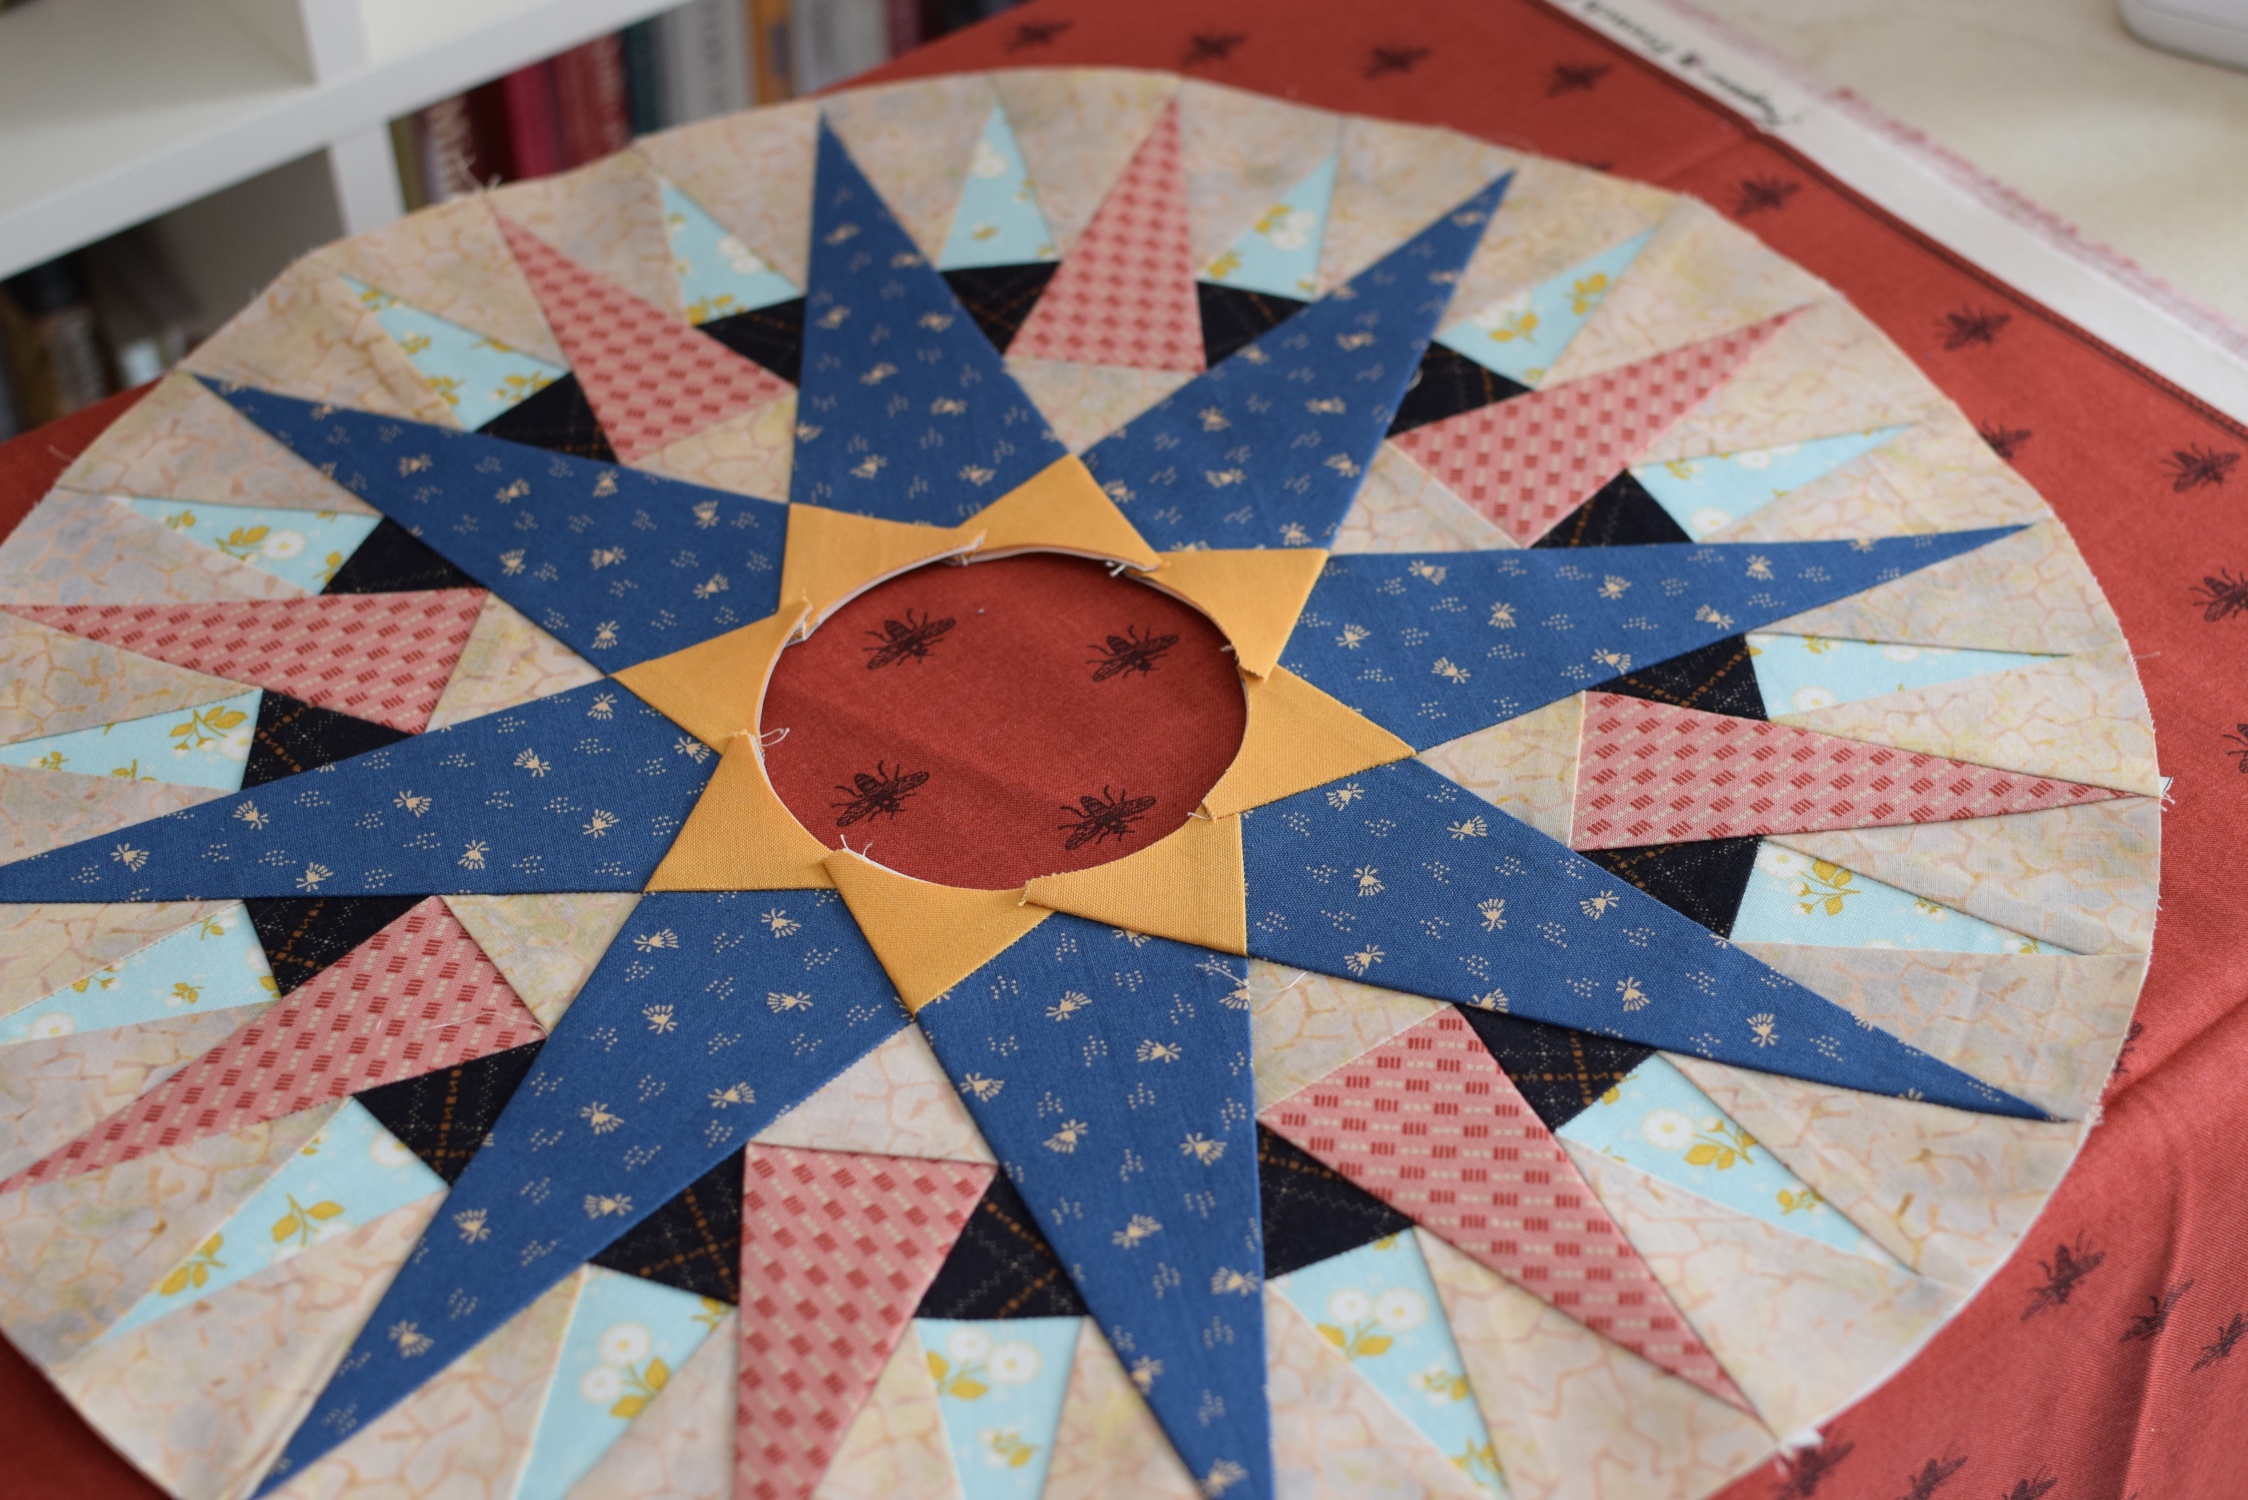
The most successful attempt is my first paper-pieced block, a Mariner's Compass design taken from Judy Mathieson's Mariner's Compass Quilts book. Again, I drafted the design in AutoCAD for the size to fit in my sampler quilt, divided them into sections, put in the alphabetical piecing order, and printed the sections with Carol Doak's legal-size foundation paper. The piecing was done with a size 90/14 sharp needle. The entire process was not so smooth as I had to rip out wrongly placed seams several times, but the end result is just so stunning. And best of all, the block is not finished 1/8" smaller. 

I didn't tried my best to cut the background with prints matching at the seams. I had the bad habit/tendency of wrapping everything up as quick as possible towards the end of a project. 

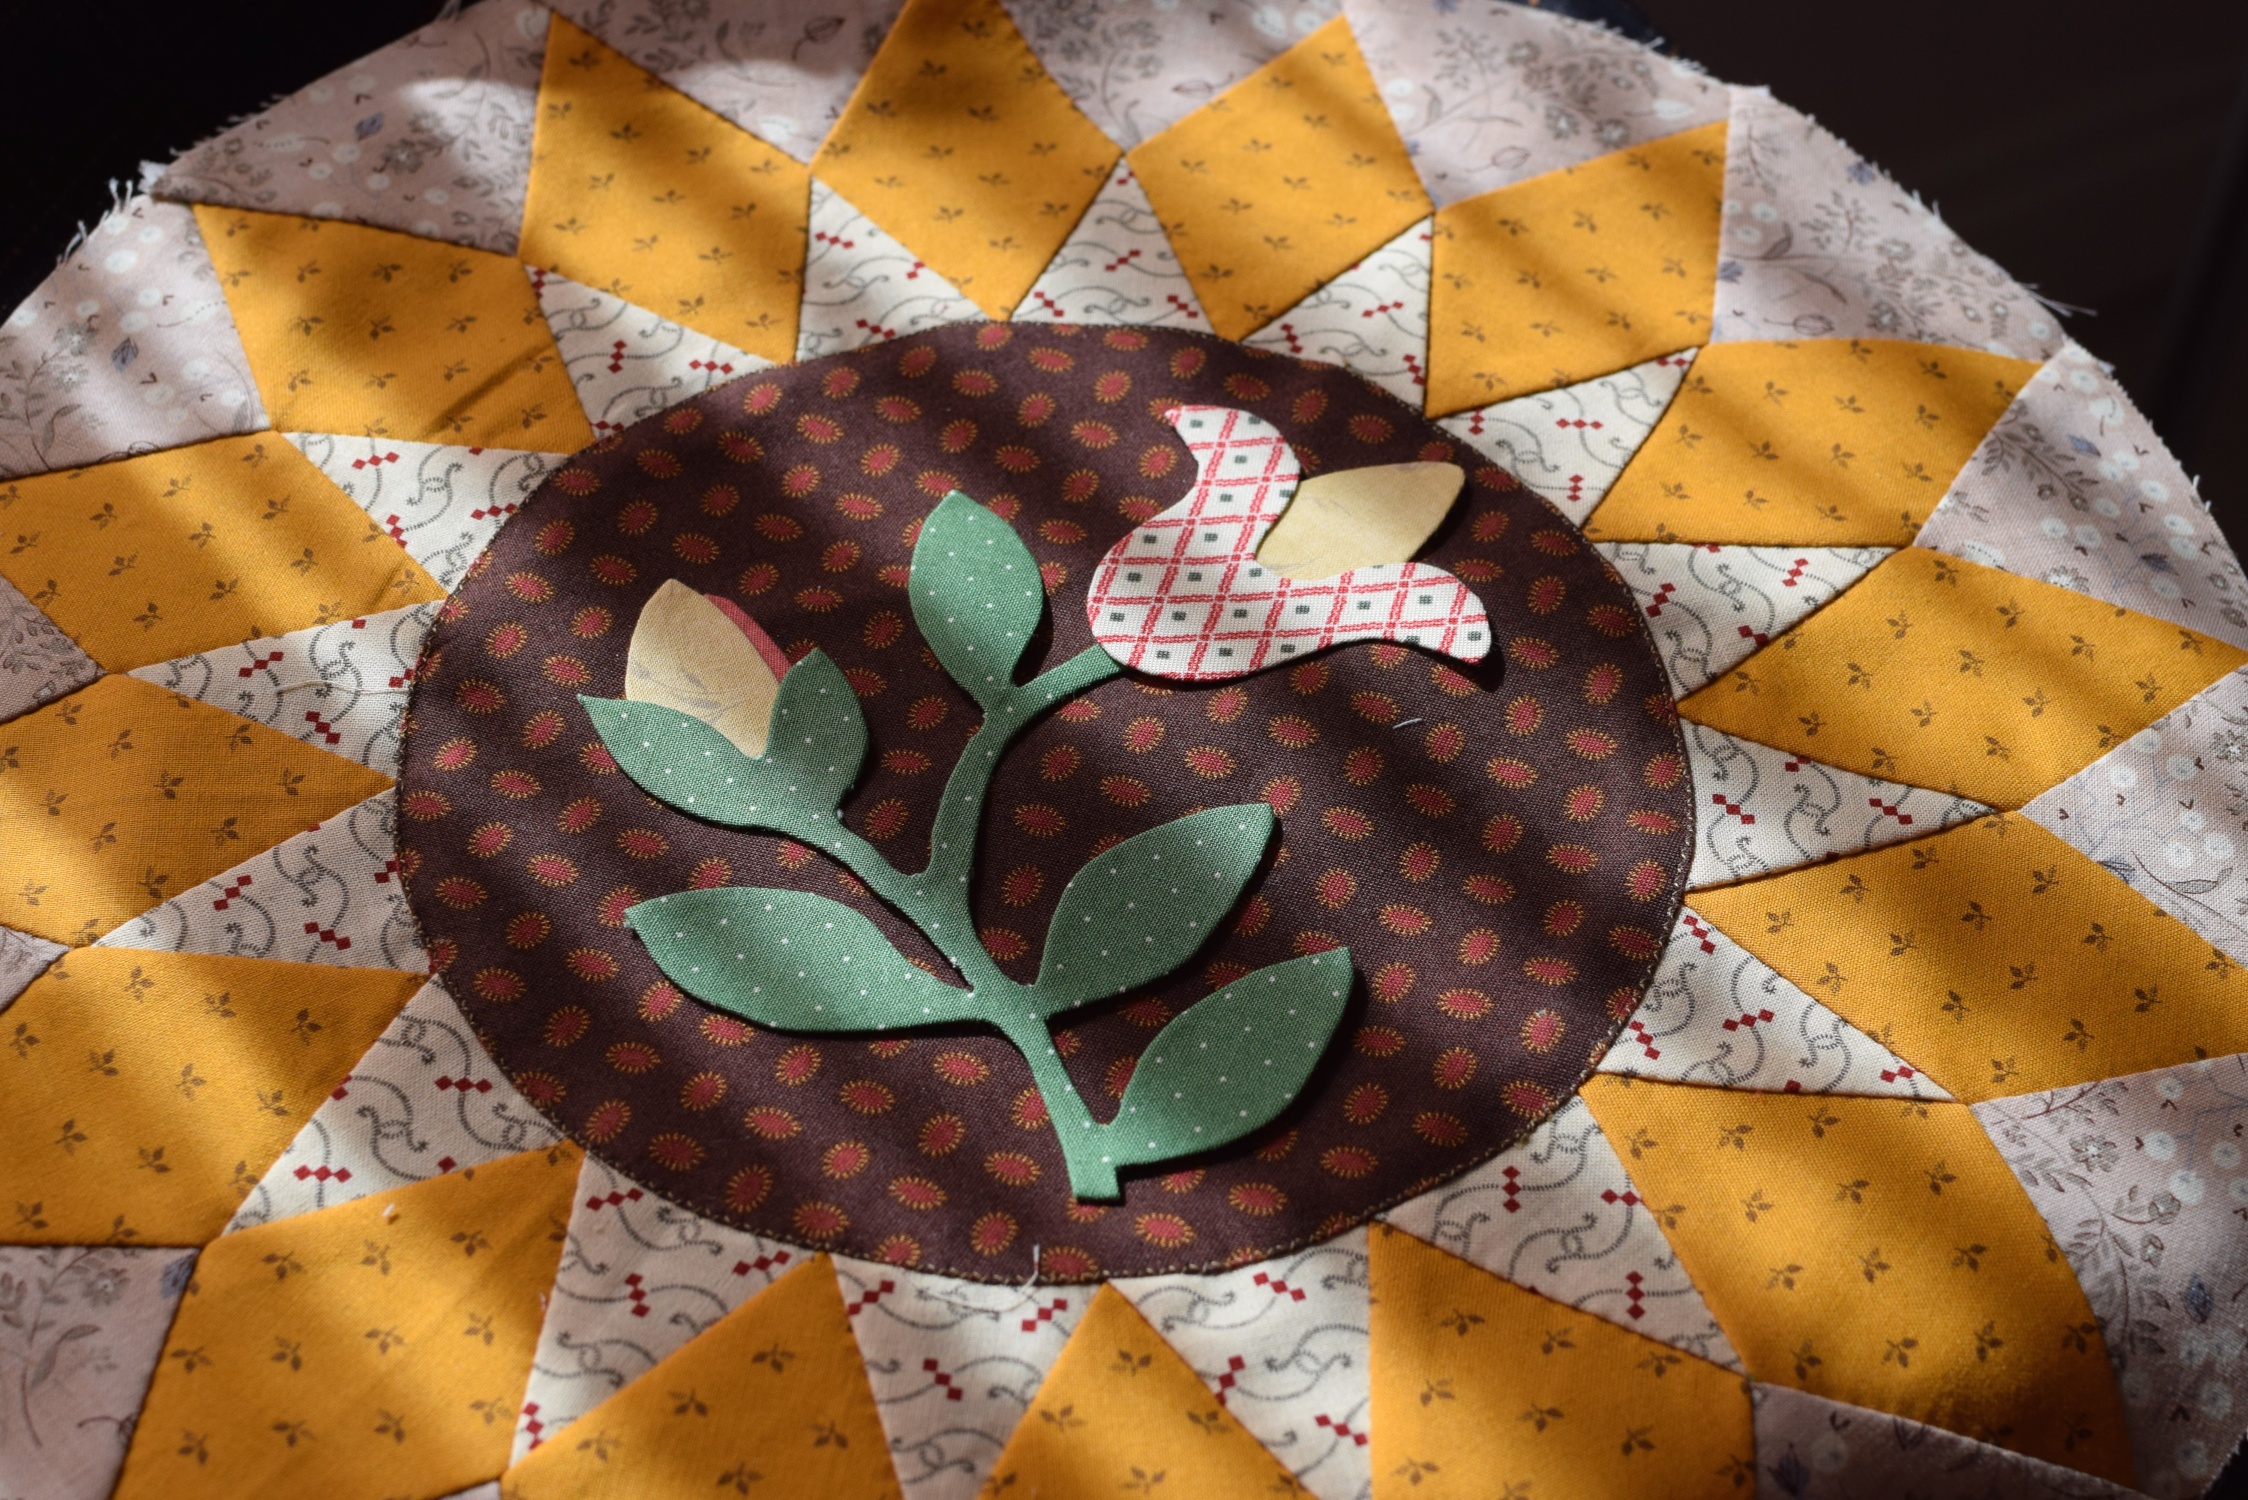
Besides the in progress sampler quilt, there was actually a small project done last month. A Sunburst block placemat that was 80% hand-stitched! It's my first attempt in hand piecing and unfortunately it's the lease precise block I've ever made so far! But surprisingly, it doesn't look that bad at all, especially after I put a little invisible machine appliqué floral motif in the centre to withdraw my attention away from the no-so-pointy-points hahahah. 

I think I will stay away from hand piecing for some time...